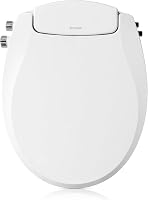
How to Install a Bidet Seat on Your Toilet
Here’s how to install a bidet seat: check the fit, shut off the water, remove the old seat, mount the new seat, and connect its water supply following the manual. Reopen the valve slowly and check every joint for leaks.
On this page (9 sections)
- What should you check before installing a bidet seat?
- What tools and parts do you need?
- How to install a bidet seat step by step
- How do you remove the old toilet seat?
- How do you connect the bidet seat to the water supply?
- How do you check for leaks after installation?
- What mistakes cause fit and connection problems?
- How should you use and care for the newly installed seat?
- Which bidet seat should you choose for your installation?
Here’s how to install a bidet seat: check the fit, shut off the water, remove the old seat, mount the new seat, and connect its water supply following the manual. Reopen the valve slowly and inspect every joint for leaks.
Most replacement seats use the toilet’s existing mounting holes and cold-water supply. A straightforward installation needs accessible hardware, a working shutoff valve, and enough room for the adapter and hose.
What should you check before installing a bidet seat?
Check bowl shape, mounting clearance, water access, and power needs before buying or removing anything. Matching the word “elongated” is only the first fit check.
Measure from the center of the seat mounting holes to the front of the bowl, then check the hole spacing and clearance behind them. Our guide to elongated vs. round toilet seats explains how to identify your shape.
Compare those measurements with the seat’s installation diagram. Check that its rear housing clears the tank and that you can reach any side control without hitting a wall or cabinet.
Look beneath the tank to see whether you can reach the water connection and seat fasteners. Skirted toilets and enclosed mounting areas can need different hardware or make routine installation harder.
Manual seats need no outlet, while electric models need suitable power within the cord’s reach. Read whether bidet toilet seats need electricity before choosing between them.
Use the best bidet seats fit-first guide to narrow your options. If you rent, check permission requirements and keep the original seat and hardware.
What tools and parts do you need?
Gather the seat’s supplied parts, its manual, a towel, a shallow container, and tools that fit the existing hardware. Lay everything out before shutting off the water.
An adjustable wrench may help with supply fittings, and a screwdriver may be needed for seat bolts. Tools are for the connections the manual allows you to tighten, not every nut you can reach.
Inspect the existing supply connector for damage and check whether it will reach the new adapter without stretching or folding sharply. Adding an adapter changes the space available beneath the tank.
Choose this Eastman connector only if its length and both ends match your plumbing. It replaces the toilet supply connector; it does not replace the bidet’s adapter or seat hose.
Skip it if your existing connector remains suitable or the route needs a different length. Allow a gentle bend rather than pulling the hose tight between fittings.
How to install a bidet seat step by step
Install the seat by isolating the water, removing the old seat, securing the mount, and connecting the supplied plumbing parts. Your model’s manual sets the exact order and tightening method.
How to install a bidet seat without forcing the fittings
- Close the shutoff valve. A multi-turn valve usually closes clockwise; a quarter-turn valve works differently, so follow its design without forcing it.
- Flush the toilet. Hold the flush lever if needed to empty more of the tank, then confirm the tank does not refill.
- Catch remaining water. Place a towel and container beneath the connection before disconnecting the supply hose where the manual directs.
- Remove the old seat. Undo its mounting hardware, lift the seat away, and clean the exposed bowl surface.
- Fit the mounting hardware. Position the supplied plate or brackets, leaving room for alignment if the instructions call for it.
- Align and secure the seat. Check that it sits straight, its supports rest properly on the bowl, and its rear housing clears the tank.
- Connect the adapter and hoses. Seat the required washers, start threaded connections by hand, and tighten as directed.
- Restore water slowly. Watch every connection as the tank fills, then check again after using the bidet.
Leave enough time for fit adjustments and leak checks. A short installation estimate should never push you to rush a stubborn valve or uncertain connection.
How do you remove the old toilet seat?
Remove the seat by releasing its hinges or undoing its mounting bolts, depending on the design. Check for hinge caps and release buttons before reaching for tools.
With a typical bolt-and-nut mount, hold the nut beneath the bowl while turning the bolt from above. Some toilets use top-fixing hardware that comes out entirely from above.
Do not pry against the porcelain or keep turning a seized bolt until something breaks. Have stuck hardware removed safely before fitting the replacement.
Clean and dry the mounting surface so the new hardware can sit flat. Keep the old fasteners separate from the bidet’s parts to avoid mixing them up.
How do you connect the bidet seat to the water supply?
Connect the adapter at the location shown in the manual, usually between the tank inlet and existing supply hose. Keep the water off throughout this step.
Check each washer before assembly, and support the tank inlet while working so it does not twist. If a nut resists immediately, back it off and realign it instead of using more force.
Do not add thread tape by habit. Many hose connections seal at a washer rather than the threads, so use tape only where the instructions require it.
Route the bidet hose away from sharp bends and moving hardware. These elongated manual seats offer different reasons to choose them once fit is confirmed.
Choose the Brondell if you want an ambient-water wash with separate front and rear nozzles and adjustable pressure. Its gentle-closing seat and sittable lid also suit households that use the closed lid as a seat.
Skip it if warm wash water is essential or your bowl is round. The included mounting parts still need to match your toilet’s layout.
Choose the Kohler if easy removal for cleaning matters to you. Its wand rinses itself after use, while Grip-Tight bumpers help hold the seat in place.
Skip it if you need powered comfort features or cannot comfortably reach a side lever. Check fit before opening the package because Kohler does not accept opened toilet seats for return.
How do you check for leaks after installation?
Open the water valve gradually and check every joint with a dry tissue. Inspect the wall valve, both ends of the supply connector, the adapter, and the bidet hose connections.
Let the tank finish filling, then check again after a few minutes. Run a brief wash as the seat manual directs and inspect once more, since some leaks appear during use.
If you find moisture, shut off the water before making adjustments. Check washer placement and thread alignment rather than simply tightening harder.
For help tracing the wet area, see why a bidet seat leaks and what to check. Leave the supply off if a connection continues to leak.
Choose the Clirass if you want supply adjustment at the adapter along with adjustable wash pressure and dual nozzles. Its slow-close lid and non-slip bumpers address slamming and seat movement.
Skip it until you confirm the mounting diagram and exact dimensions: the supplied size descriptions differ. Its adapter shutoff does not replace closing the toilet’s supply valve before disconnecting plumbing.
What mistakes cause fit and connection problems?
The main mistakes are forcing mismatched threads, overtightening nuts, and securing the seat before checking alignment. Stop when a part resists or the seat cannot sit flat.
A rocking seat may need mounting adjustment rather than tighter bolts. Check that the correct supports contact the bowl and that nothing underneath is holding it up.
A stretched hose needs a better route or the correct replacement, not extra force at the nut. Do not improvise fittings just because two parts nearly screw together.
For unusual toilet layouts, read can you add a bidet to an existing toilet?. If you bought an attachment that sits beneath your current seat, use the separate guide to installing a bidet attachment.
How should you use and care for the newly installed seat?
Start with the lowest wash pressure, then increase it gradually while seated. Check how the controls work before turning them, and return them fully to the off position after use.
Ambient-water seats use unheated supply water, which can feel cooler in cold weather. Do not connect one to hot water unless its manual expressly permits that setup.
Clean the seat with products and methods its manual allows. Avoid pulling on the hose when cleaning beneath a removable seat, and follow our guide to how to clean a bidet nozzle.
Recheck connections after the first few uses and after moving the seat for cleaning. New moisture, shifting, or a kinked hose needs attention before regular use continues.
Which bidet seat should you choose for your installation?
Choose Brondell for manual front and rear washing, Kohler for easier cleaning access, or Clirass for adjustment at the included adapter. Each still needs a confirmed elongated-toilet fit.
Buy the Eastman connector only when your supply line needs replacing and its connections and length match. Choose a different seat category if you need a round fit or warm-water features.
Knowing how to install a bidet seat starts with choosing one your toilet can accept. Use our bidet seat fit guide to settle that choice before taking the old seat off.
Frequently asked questions
Do you have to turn off the water to install a bidet seat?
Yes, close the toilet’s shutoff valve before disconnecting a water fitting, then flush and confirm the tank stops refilling. Some water will remain in the tank and hose, so place a towel and container underneath.
If the valve does not stop the flow, have it repaired before continuing.
Can you install a bidet seat yourself?
Many manual bidet seats suit a DIY installation when the toilet fits, the shutoff valve works, and the connections are accessible. Read the manual before removing anything and allow time for alignment and leak checks.
Get help if hardware is seized, fittings do not match, or a joint keeps leaking.
Do bidet seats need an electrical outlet?
Manual bidet seats do not need an outlet, but electric models need a suitable power supply for their powered features. Confirm the outlet requirements and cord reach before buying.
Follow the seat manual and local electrical rules, and have an electrician handle any outlet work your bathroom needs.
How do you stop a bidet seat connection from leaking?
Shut off the water before adjusting a leaking connection, then check its washer, thread alignment, and hose routing. Reassemble it according to the manual without forcing the threads or overtightening the nut.
If the leak continues, leave the water off and ask the manufacturer or a plumber for help.